How To Fix Read Only Usb Flash Drive
Failed to format read only USB drive in Windows 7
"I have a 32GB USB flash drive bought recently. I need to copy my video file from my computer to it and I know that it isn't available to store individual file over 4GB on it. Therefore, I decided to format my flash drive to NTFS file system in Windows 7.
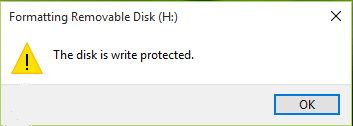
But when I formatted it, the error message – The disk is write-protected appeared. I don't know how to deal with this problem. What should I do to format read-only USB drive in Windows 7 successfully? Any advice will be appreciated!"
Five quick solutions to disable read only for USB drive on Win 11/10/8/7
It is common that users encountered the disk being read-only (write-protected) problem during formatting. Normally, if your USB drive is write-protected, it is in read-only status and you'll not be allowed to delete or modify files on the USB drive, which can protect the data on your USB. If you need to format read-only (write-protected) USB drive, you can remove write protection from it using the following tricks at first.
→ Check write protection tab
Some USB flash drive or SD card is with a physical lock slide tab. If your USB drive is with such a tab, check the position of the lock tab and make sure it is in unlock position. Then, you can format the USB drive. If your USB drive is without such a tab, skip this method.
→ Clear read only on USB drive via Diskpart
To fix disk is write-protected issue, you can check the properties of the USB drive via Diskpart at first. The steps are listed as follows:
1. Open Run box by pressing Windows + R simultaneously.
2. Input "diskpart" and hit Enter key.
3. Type the following command and hit Enter after each command.
▪ list disk
▪select disk n
▪ attributes disk
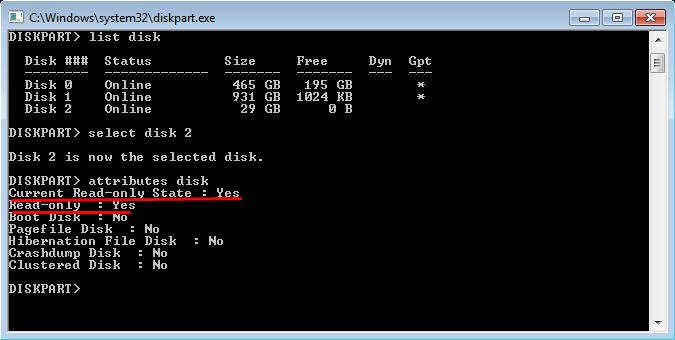
If you see " Current Read-only State: Yes," and "Read-only: Yes" type "attributes disk clear readonly" command and hit "Enter" to clear read only on USB drive. Then, you are able to format the USB drive successfully.
→ Disable write protection in Registry Editor
If you see "Current Read-only State: Yes" and "Read-only: No", it is time to consider whether the value of Windows Registry key is right. If not, you can edit the Windows Registry key to disable write protection. Here are detailed steps
1. Open Run box, type "regedit" and press "Enter" key.
2. Go to the path given below:
Computer\HKEY_LOCAL_MACHINE\SYSTEM\CurrentControlSet\Control\StorageDevicePolicies.
PS.: If there is no StorageDevicePolicies under Control, right-click "Control", choose "Key" and name it StorageDevicePlicies; Then right-click the StorageDevicePolices folder, go to "New ">"DWORD (32bit) Value" and name it WriteProtect.
3. Right-click the WriteProtect and change the value from 1 to 0. Then, click "OK" to disable read only for your USB drive.
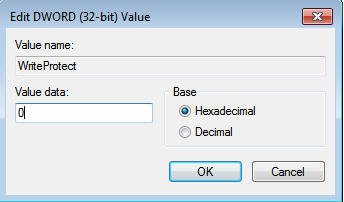
After editing the value of Windows Registry key, try to format your USB drive in File Explorer again. If this way is invalid, try another one.
→ Remove write protection via CHKDSK
To fix read only on USB drive caused by corruption, you can run CHKDSK utility to solve this problem. Let's see how it works:
1. Open Run box, input "cmd" and hit Enter.
2. Input "chkdsk e: /f", where "e" is letter of partition on your USB.
PS.: If you are prompted by the message – The operation could not be completed because the volume is dirty, you can try the following command: chkdsk e: /f/r/x to remove dirty bit and write protection on the USB drive.
After that, you can input "exit" to close this window and format your USB drive.
→ Third-party format tool to format write-protected USB drive
All described methods are helpful in removing write protection on USB drive. In many cases, you are able to format the USB drive without receiving an error message – The disk is write-protected. But it is possible that you are still unable to format it using File Explorer or Disk Management. In such a case, it is recommended to try this comprehensive and powerful third-party format tool – AOMEI Partition Assistant Standard.
It can format USB drive to FAT32, NTFS, exFAT, Ext2, or Ext4 to make USB drive compatible with different operating systems or electronic devices. And you can experience more features, such as converting dynamic disk into basic, if you upgrade it to Professional version. Here is a step-by-step guide to format the USB drive using AOMEI Partition Assistant.
Step 1. Free download this format tool – AOMEI Partition Assistant Standard. Install and fire up it.
Step 2. In the main interface, find out the USB drive, right-click the partition on it and choose "Format Partition".
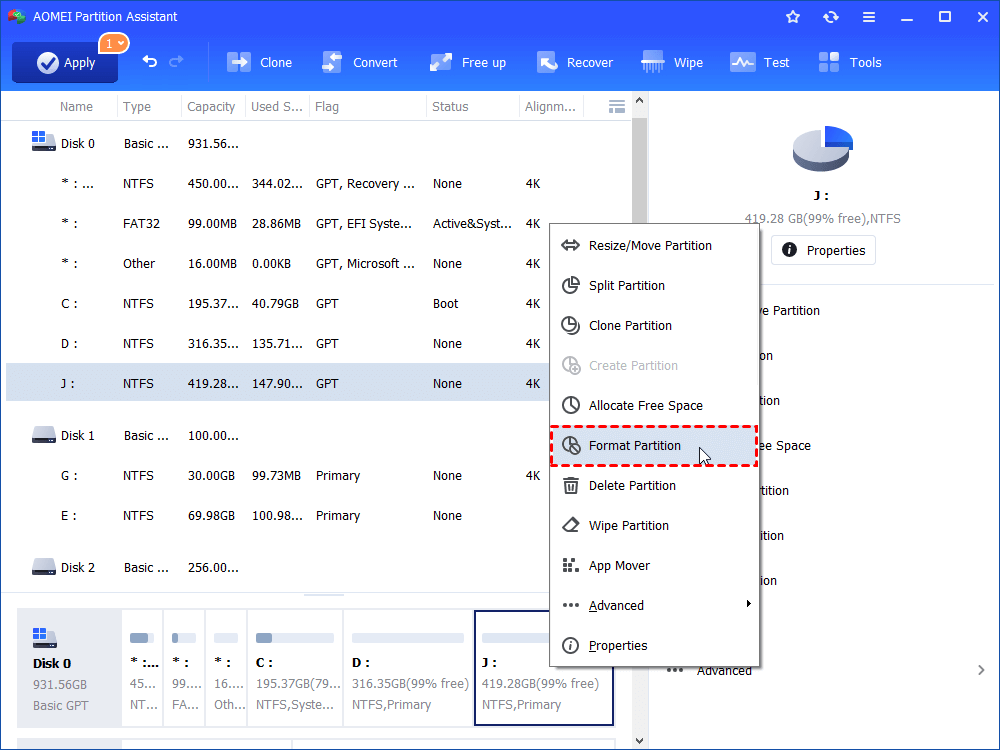
Step 3. Set the file system of the partition and click "OK".
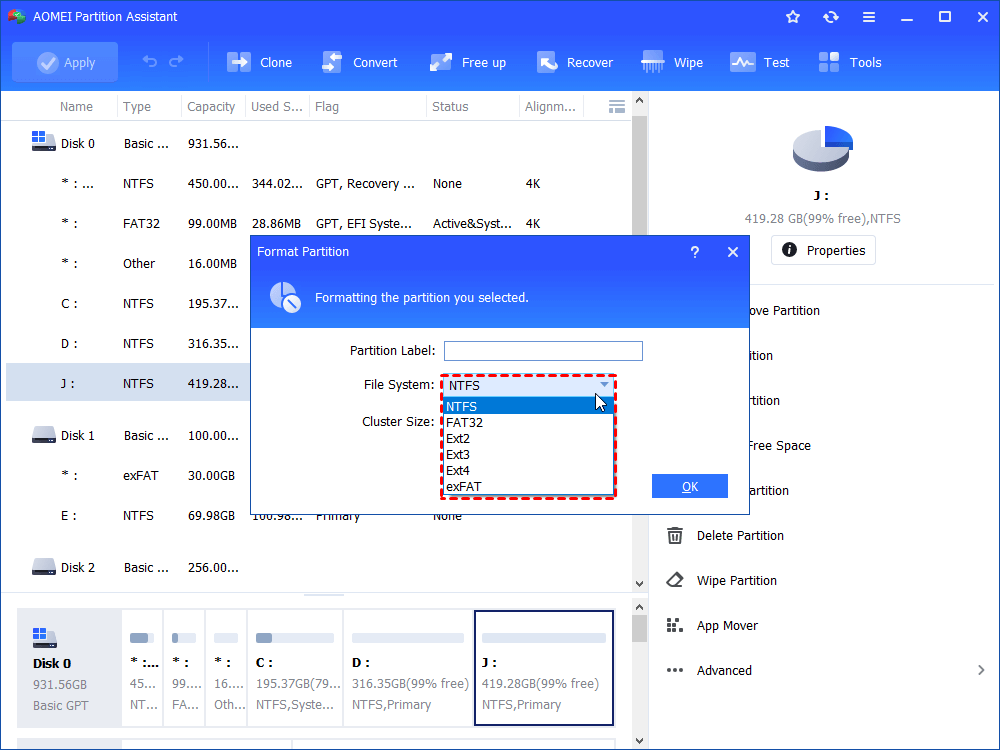
Step 4. Check the pending operation and click "Apply" to execute it.

PS.: AOMEI Partition Assistant Standard is able to work with Windows 11/10/8.1/8/7, XP, and Vista.
Verdict
If you need to format read-only USB drive, it is necessary to remove write protection from it in advance. It is unnecessary to try every method aforementioned to remove write protection on your USB drive. You can choose one or more ways based on your own specific situation.
How To Fix Read Only Usb Flash Drive
Source: https://www.diskpart.com/articles/format-read-only-usb-0310.html
Posted by: boosegialren.blogspot.com

0 Response to "How To Fix Read Only Usb Flash Drive"
Post a Comment